Building a Life-Size R2-D2

Dedicated fan, or crazy person. It’s a fine line, they say. You’ve probably crossed the line when the number of life-size robots and assorted villains outnumber the human inhabitants of your house. Ah well, I guess I am progressing from “crazy” to “very crazy” as I start my latest project: a life-size, aluminium R2-D2.
This is an ambitious project I have been intent on undertaking for a couple of years now. And recently, I finally got around to taking hacksaw and power-tools to metal in pursuit of my own life-size astromech. I take comfort in the fact that there are many others out there similarly obsessed…indeed, a couple of online groups (see links at the end of this article) actively facilitate collaboration for the sake of planning and production of parts. Standardised plans available through the hard work of such groups (that average out the difference in all of the many Artoo units used in filming) mean that dimensions can be used, or taken to a engineering shop to have parts machined, in such a way that all individual compenents will fit together with excellent tolerances.
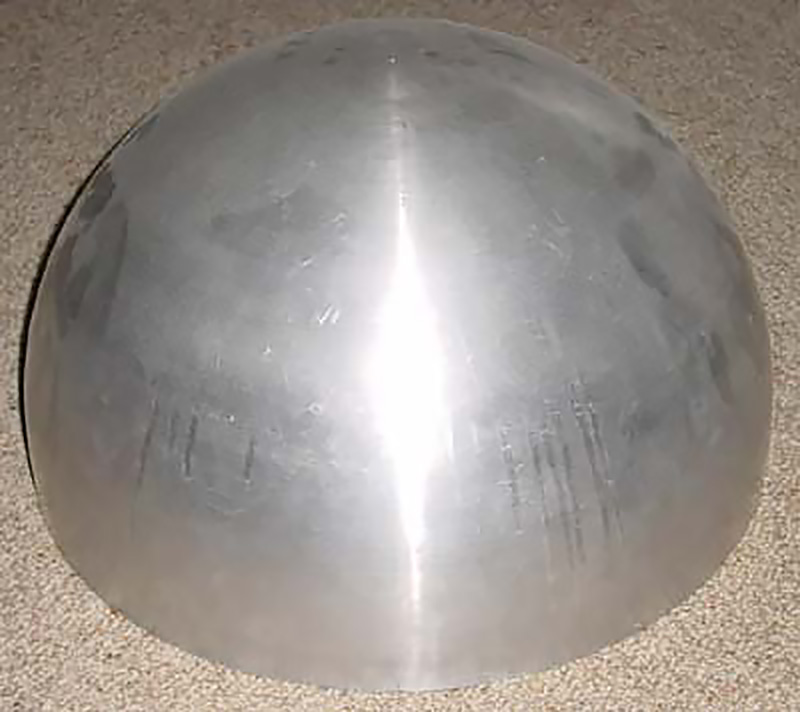
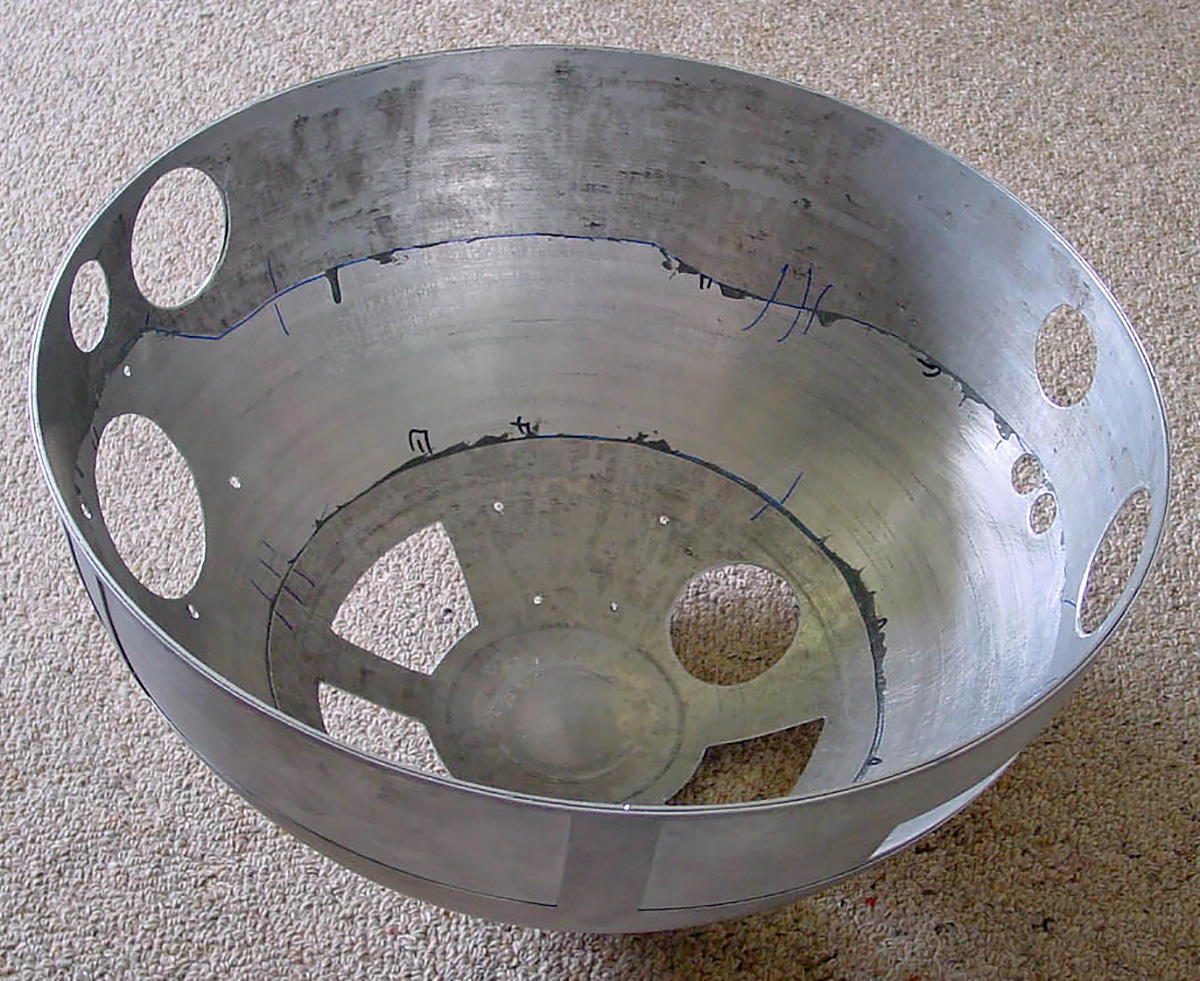
I have chosen to start with the dome. This would be one of the hardest parts to tackle by hand, so, with the help of some acquaintances using similar methods, I am basing mine on a double-layered, laser-cut aluminium dome engineered overseas (kudos to Ron and Jason of ‘R&J Superdome’ fame). Artoo’s dome, despite initial appearances, isn’t a hemisphere, but rather has one axis longer than the other. This makes the paths a cutting laser must trace quite involved to compute and execute… a 5-axis computer-controlled laser is required, and none capable of completing the task were available in New Zealand.
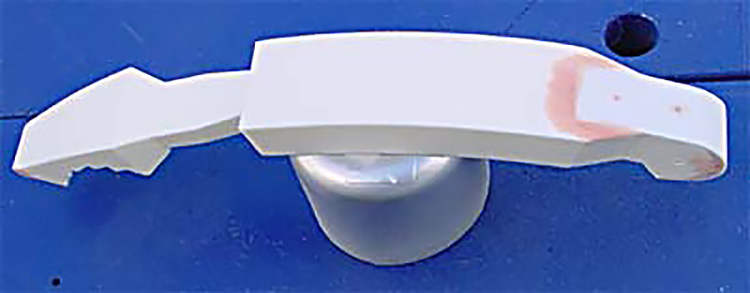
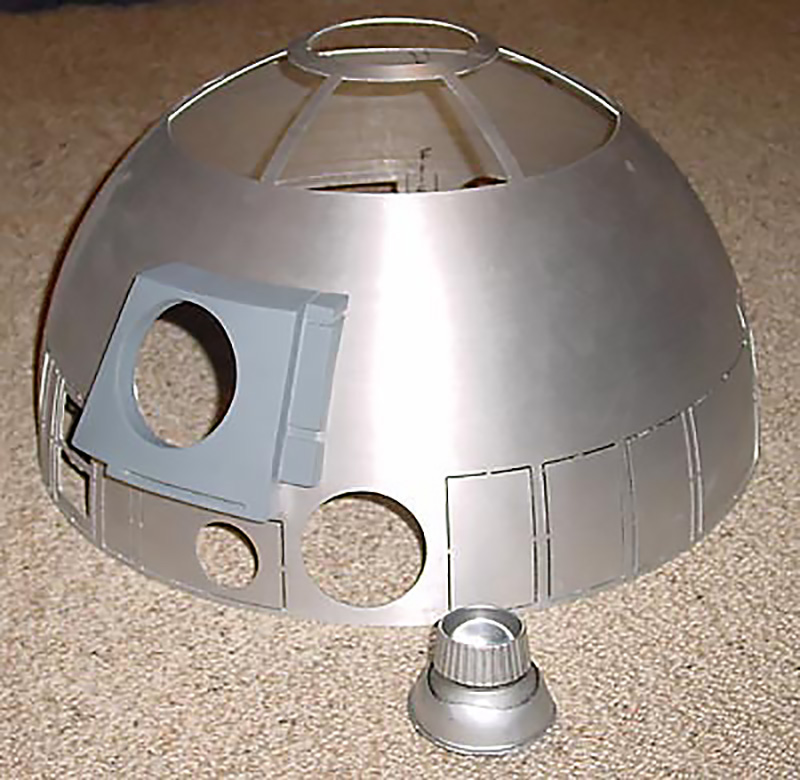
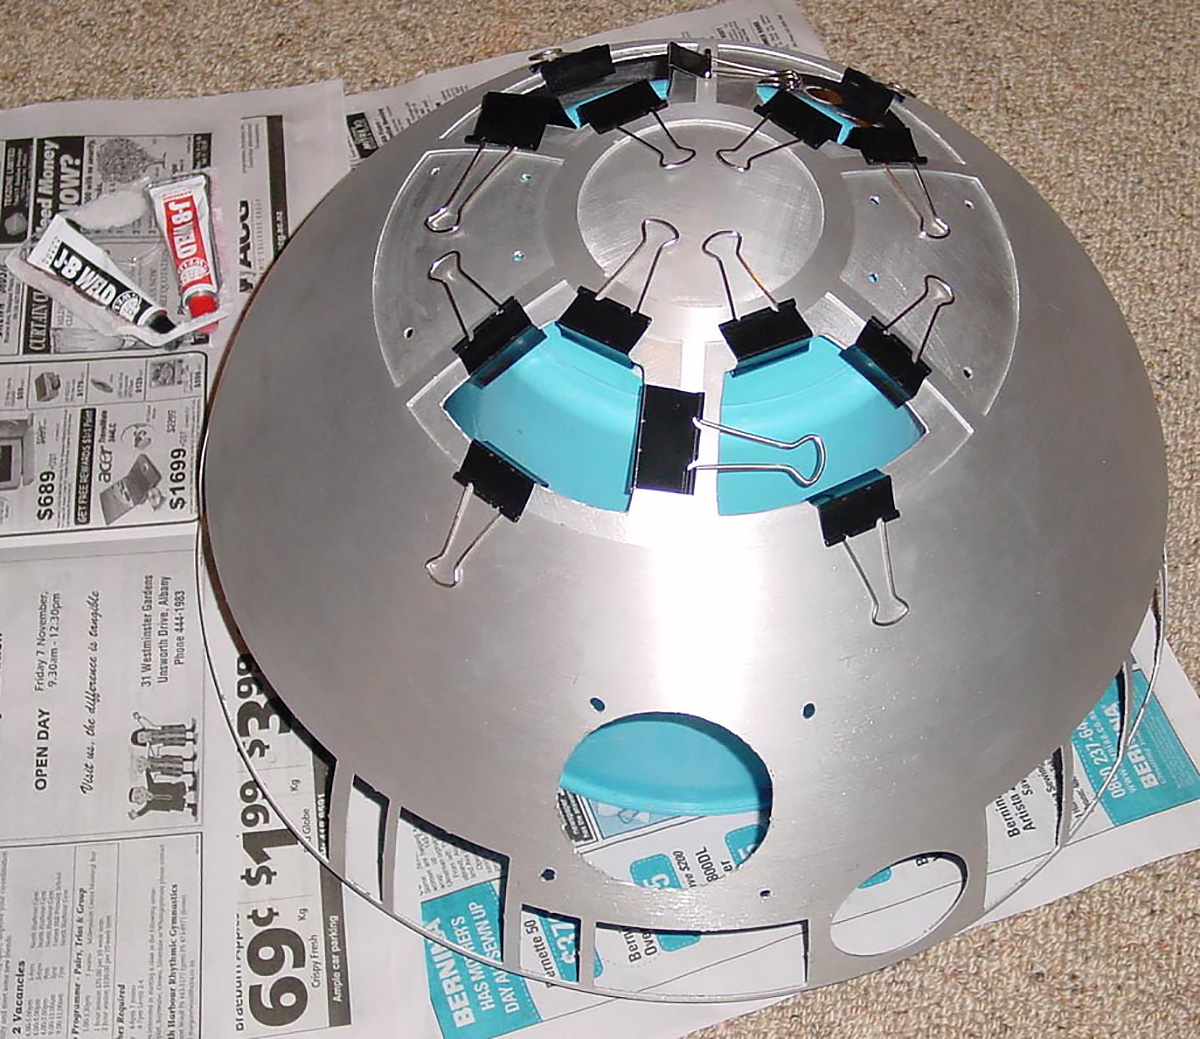
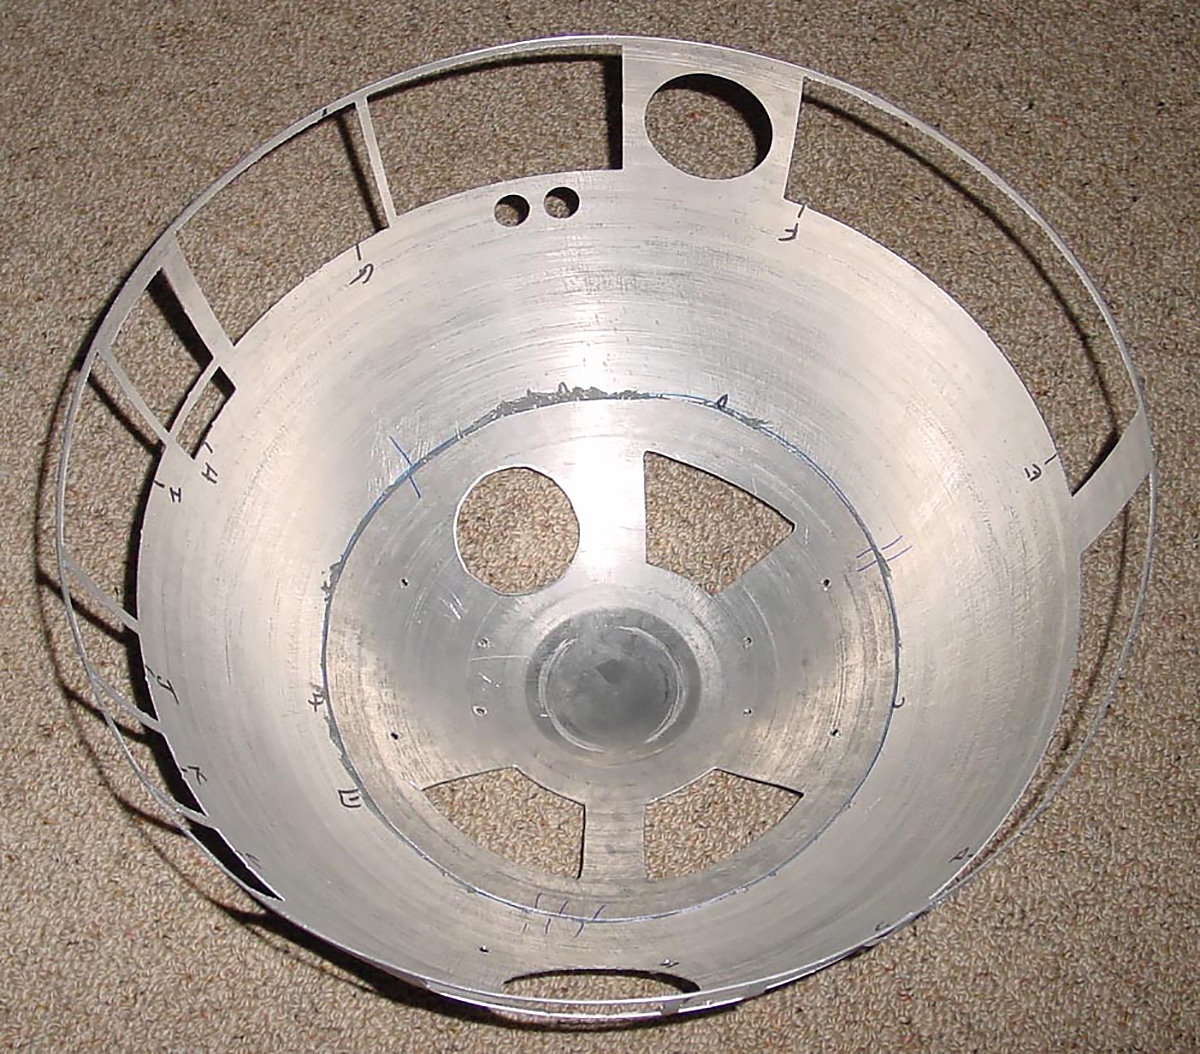
The idea behind a 2-layered dome is that an internal layer, which does not need to be complete, supports the panels of the external layer. You’ll start to see how that comes together in a follow-up article, but clicking on the thumbnails above (fourth and fifth images) will show the apical portion being glued in place. The panels and holes for details have been cut, by laser, in the outer dome, but need to be cut manually, using a high-speed rotary tool (I use a Dremel) and a lot of cutting discs.

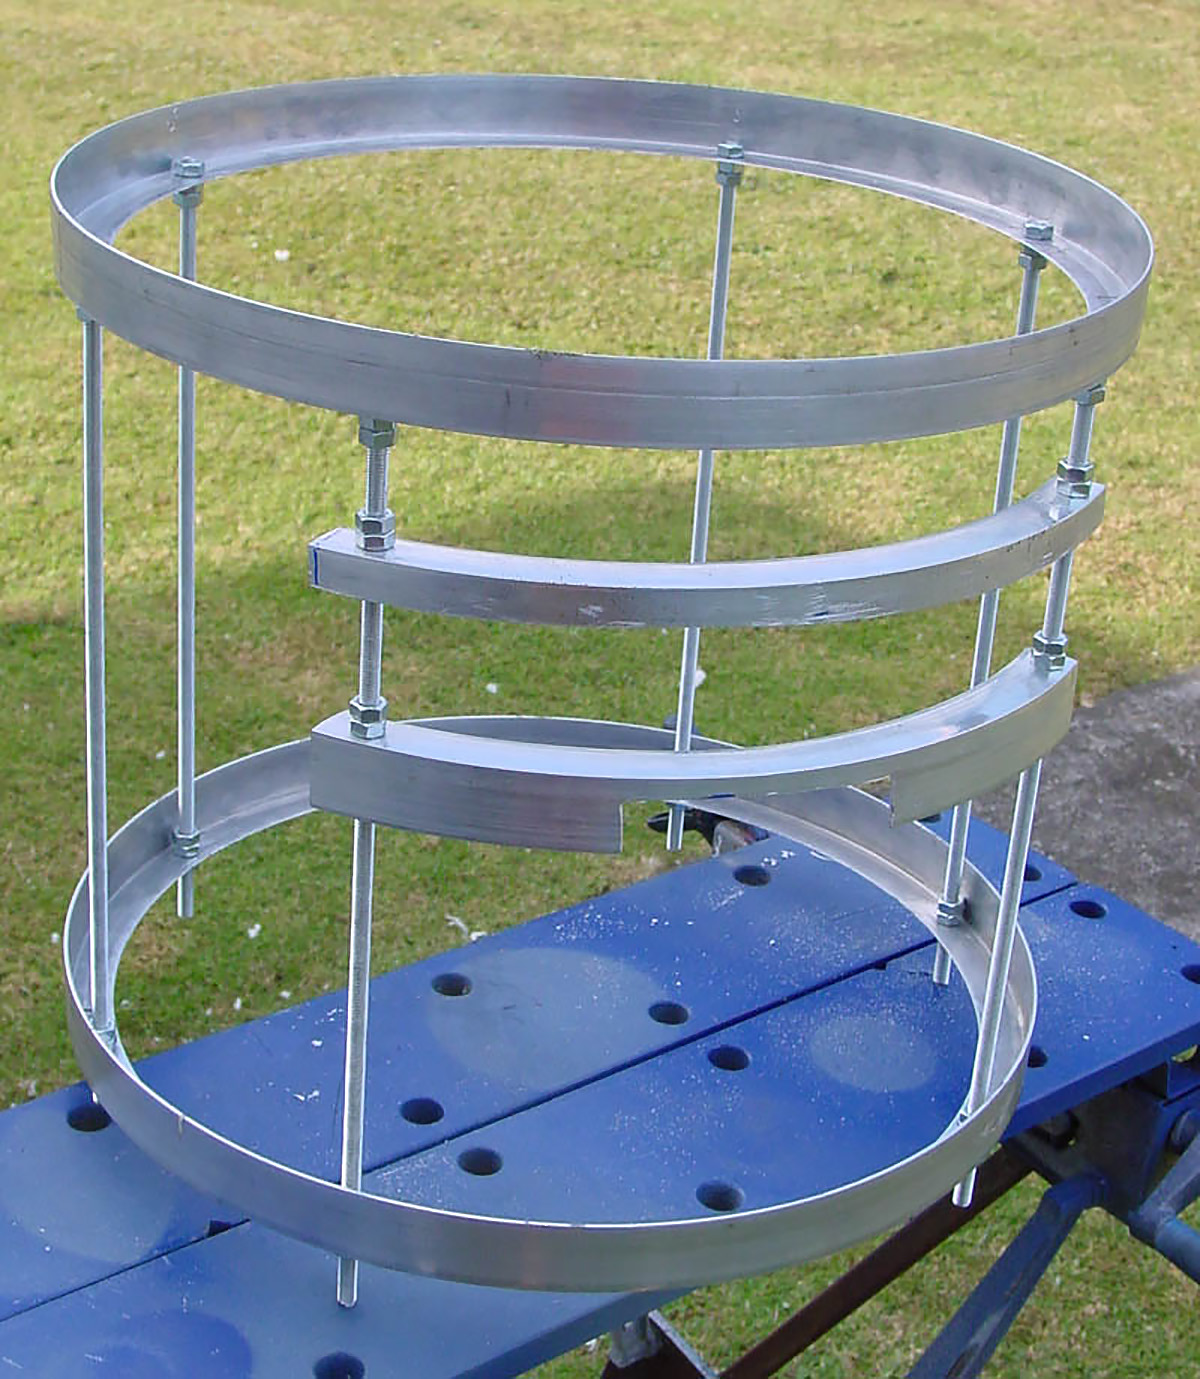
A similar 2-layered approach is used for the body ‘skins’, for the same reason. Beneath the skin, some sort of a supporting frame is required – the sixth image above shows the initial steps in the skeleton construction… the critical step here is ensuring that all rings and partial rings are 100% parallel, otherwise the skins won’t align properly, and all subsequent construction will be off.
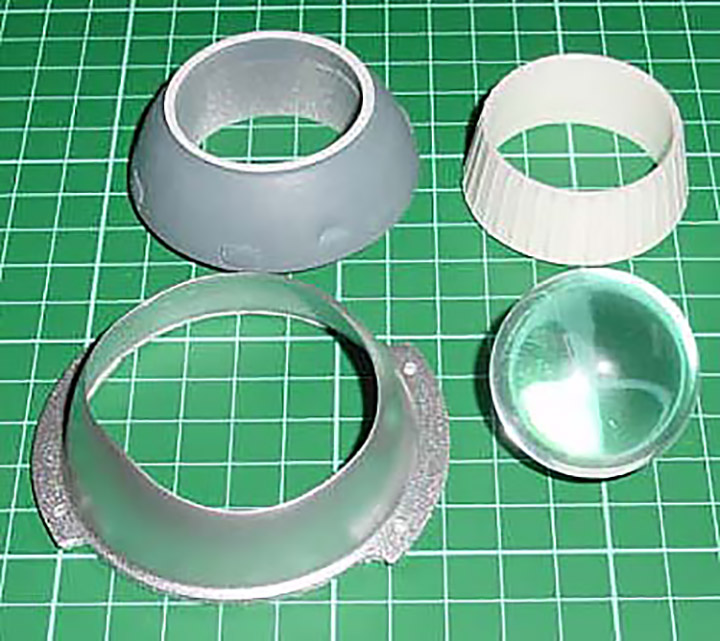
Because the epoxy glue used takes 24 hours to cure (I am also using a rapid-set version for smaller parts, but for the major dome and body work, I need the bullet-proof stuff), I have started on a few of the detail parts in parallel. Some of you will know that the 3 holoprojectors on an astromech dome are actually reading lamps from a Vickers Viscount 700 aircraft. The real items are in short supply, but fortunately, a number of very passable replica versions are available. The thumbnails above link to progress shots of modified cast resin replica using an acrylic sphere for the lens. I am going to use such resin pieces for the top and rear holoprojectors, but am looking forward to shortly receiving an expertly machined and very accurate aluminium copy that will be used for R2’s front holoprojector, and will include lighting effects.
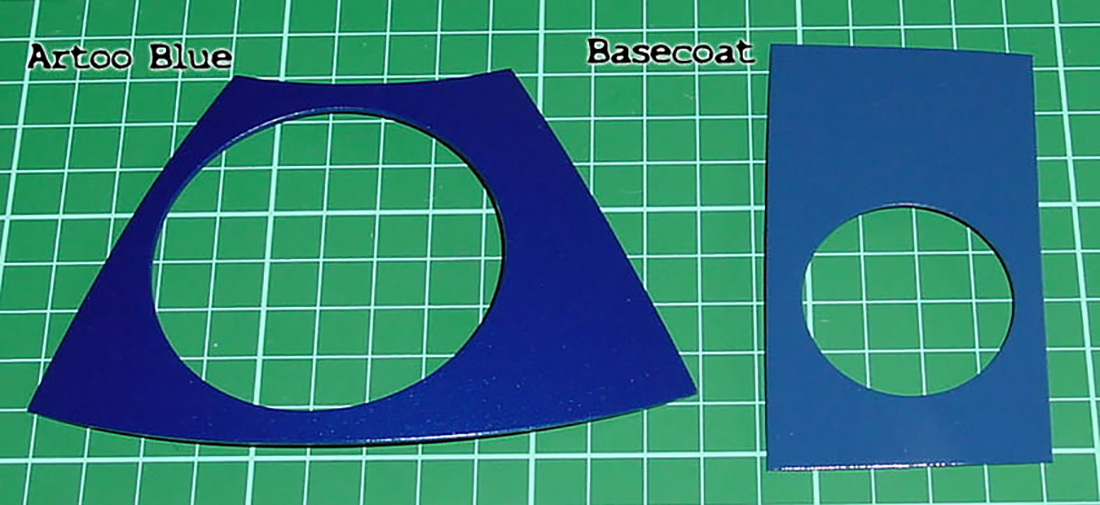

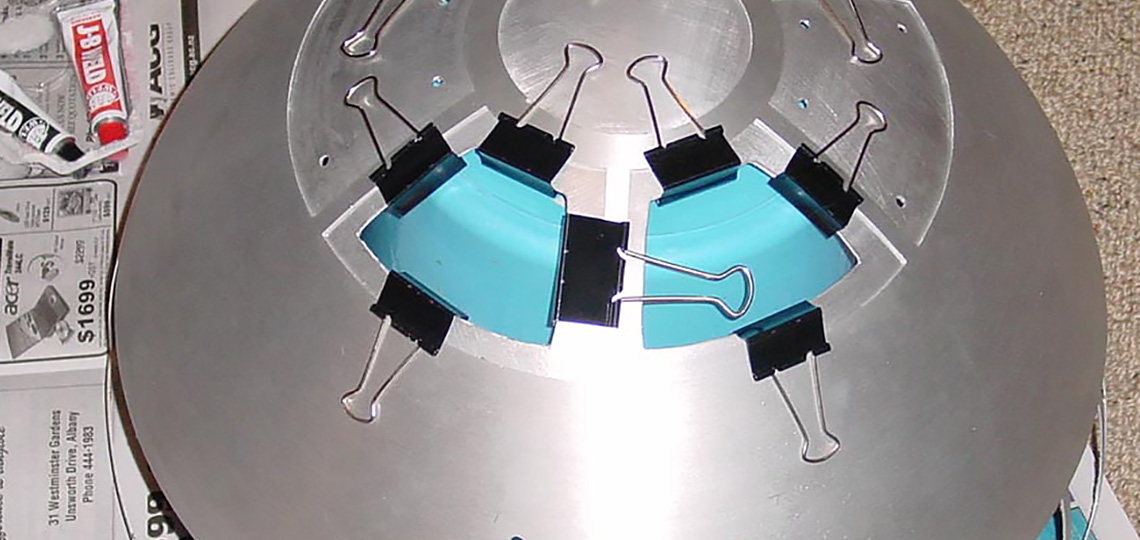
And the final simultaneous thread in this project is the painting. I am starting with all the blue components (and a couple of replica pieces that are metallic aluminium in colour). Each panel or detail piece needs to be filed, sanded and then receives up to 9 or 10 coats (3 or 4 each of aluminium etching primer, base coat and pearlescent lacquer) in order to achieve the desired finish. That will be the topic of the next installment…
Artoo Blue
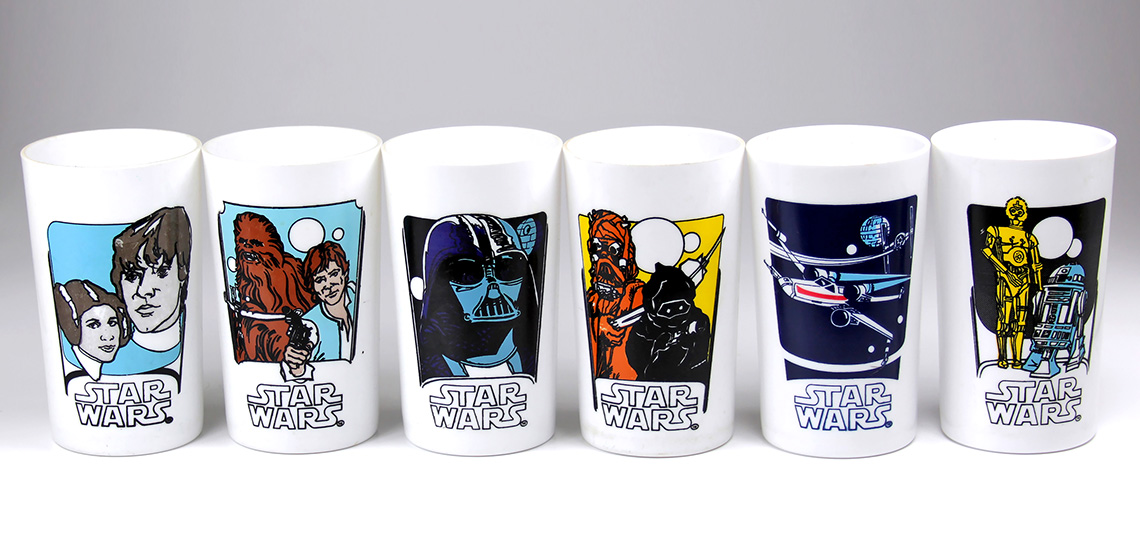
With his cylindrical body, domed head and detailed limbs that can transition from 3-legged to 2-legged mode, R2-D2 broke new ground in fictional robotic morphology. Indeed, all the primary characteristics of his form are protected by patent – assigned to 20th Century Fox Film Corporation, but declaring Ralph McQuarrie (conceptual artist) and John Sears (robot-builder extraordinaire) as his inventors. Even amongst other astromechs, however, Artoo is immediately recognisable – a consequence of his simple, but ever familiar, colour scheme of white, metallic silvers and iconic blue. In fact, Artoo-blue is a colour rarely seen elsewhere. Metallic and pearlescent, it is more of an effect than it is a colour, appearing quite different in saturation and intensity depending on angle and incident light. This makes it hard to reproduce on a life-size replica. The original Artoo-blue was achieved by applying coats of “candy-apple” blue over a proprietary mix of darker colours. I’ve taken a slightly simpler approach by using a colour-matched pearlescent lacquer over a fairly close blue base coat.

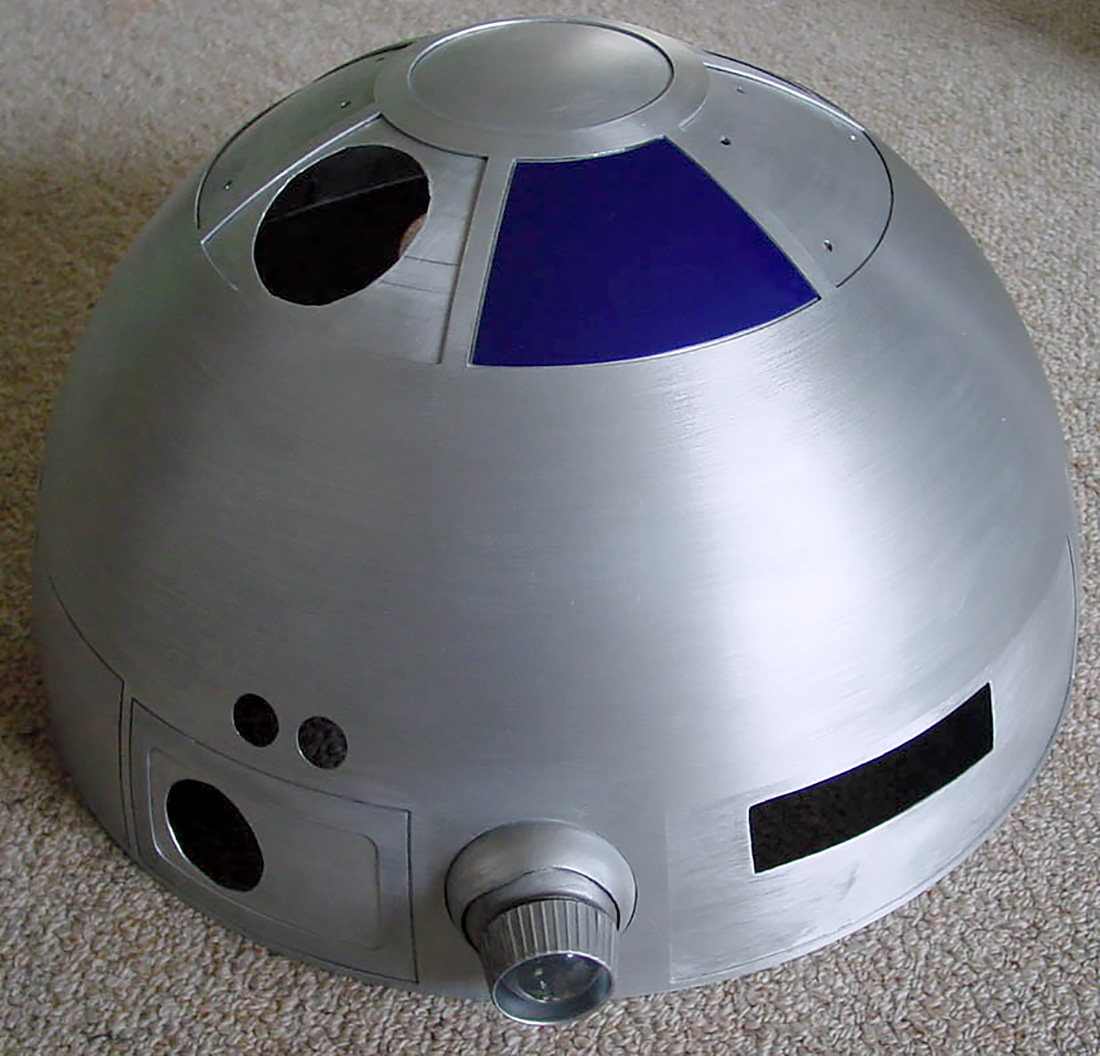
So, following on from the construction of the dome foundations, I have been painting up the blue panels of the dome, and a couple of the key details of the body (see pics below, of the front grasper arms before and after painting). Fortunately, most of the components that need to be coloured are single, standalone pieces, meaning only a small amount of masking has been required. Each panel glued onto Artoo’s dome makes him look a little more like the real thing. I was also eager to start adding in the dome details. As well as the first, rear holoprojector shown in the fourth picture above (click on the thumbnail), there are the frames that go around the front and rear “logic displays”, and minor things like a couple of small dome protuberances around the back of Artoo’s head.
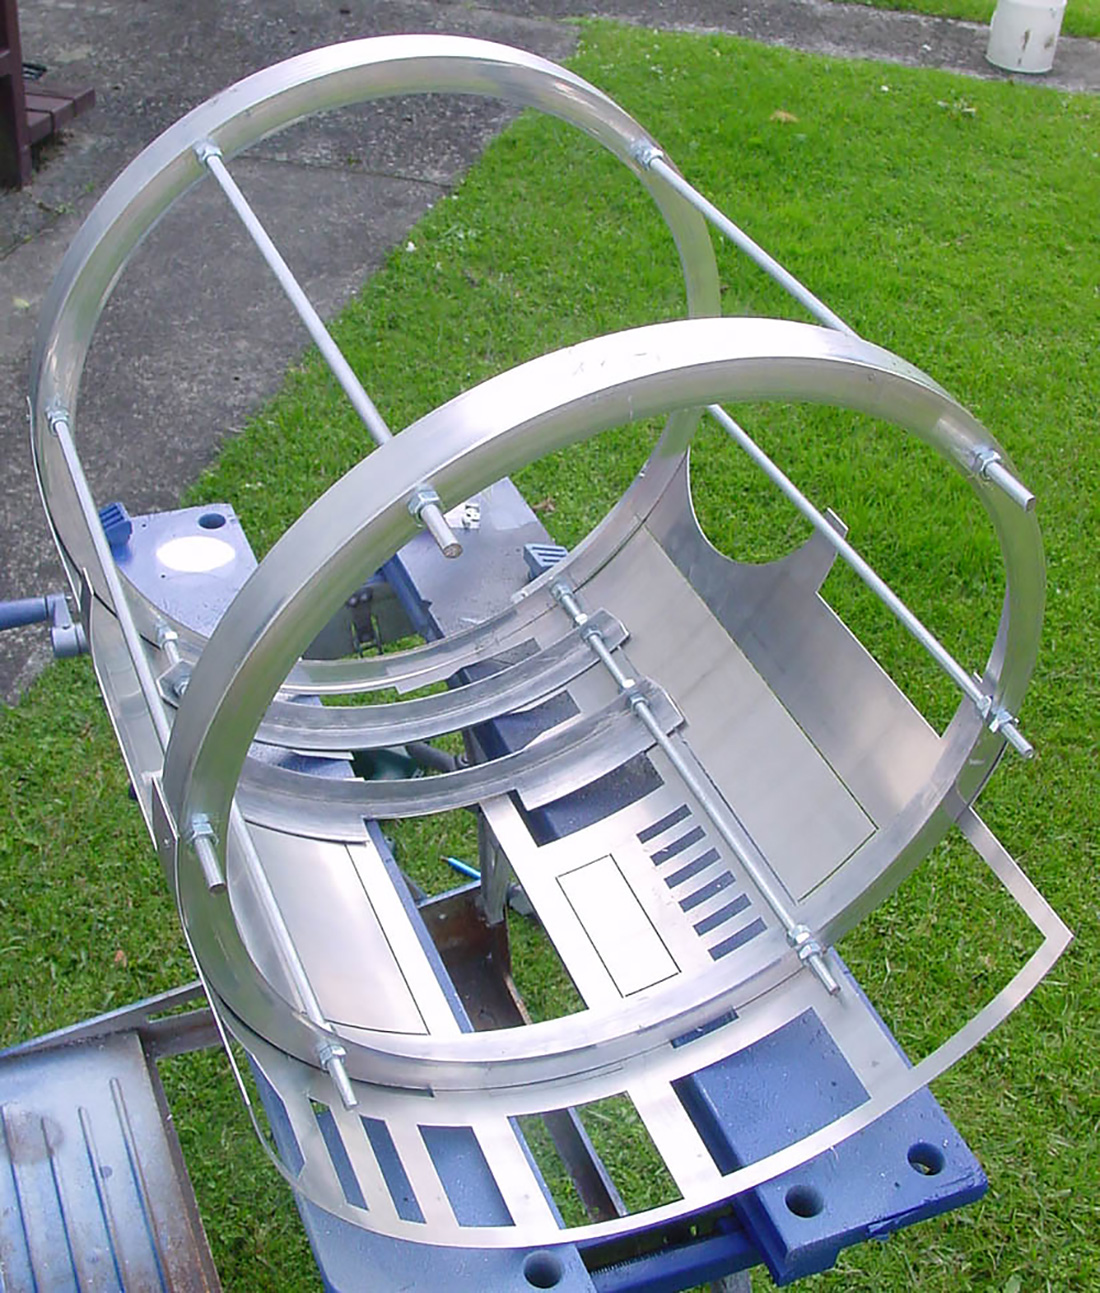
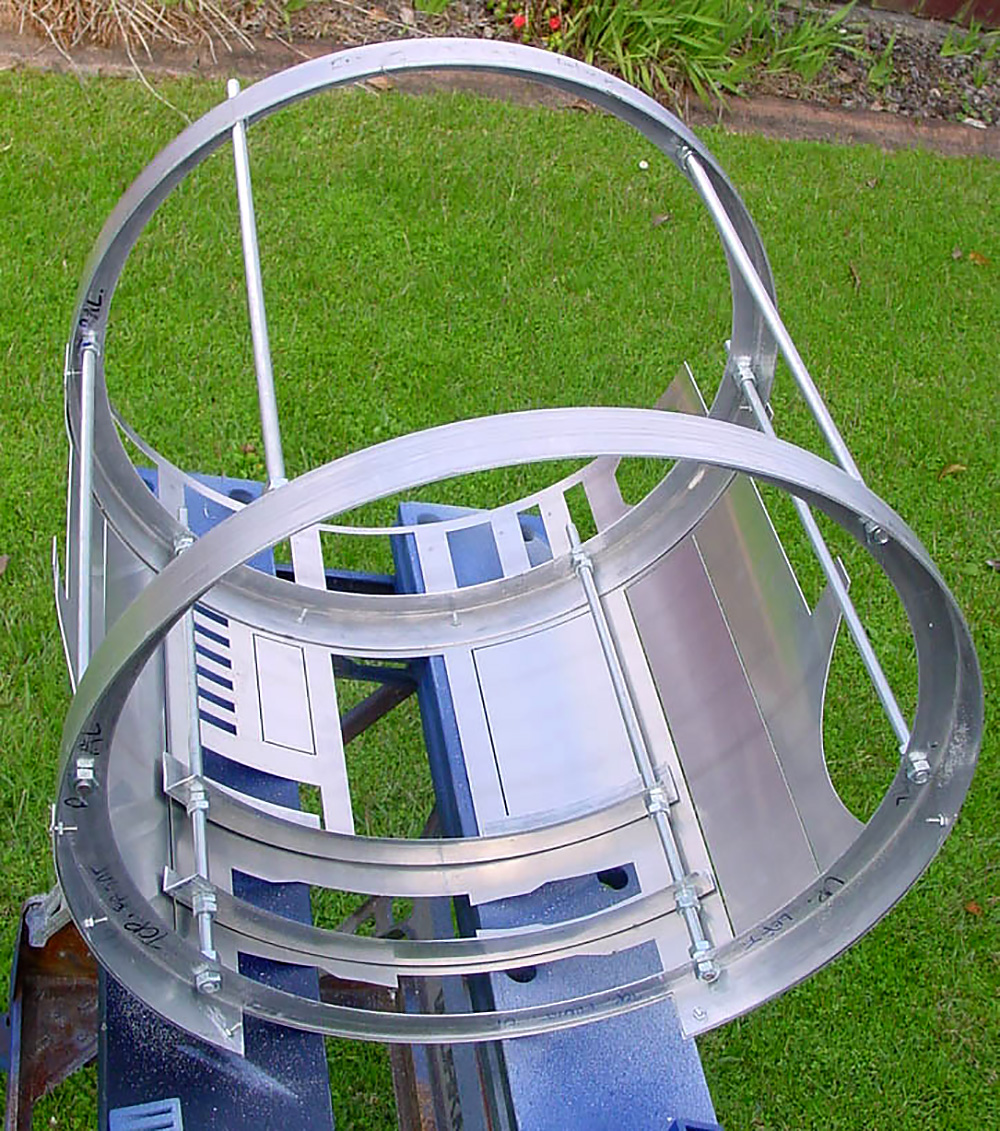
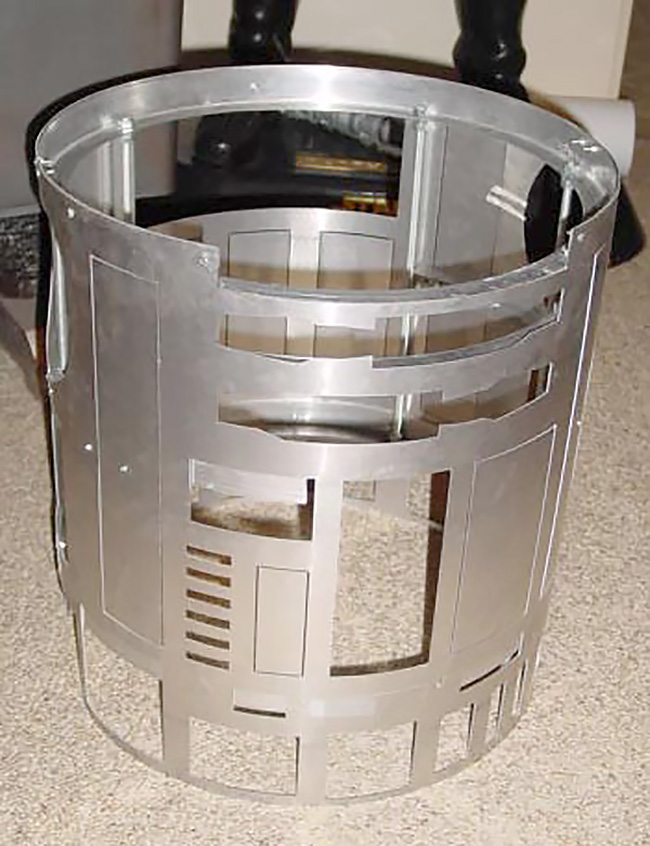
During this phase of construction, I have also made further progress on the frame and body. These will be the focus of the next installment, but, there are a couple of progress pics at the top of the page. Although the body uses a 2-layered skin approach, similar to the dome, it differs in that a skeleton under the skin is required. The images above show the first layer being fixed in place. The inner layer is attached to the frame using countersunk rivets, to give a completely flush finish. This allows the outer skins to be glued over the inner skins, hiding all the rivet points. Various brackets are required on the inside of the inner skin in order to mount the body detail components… but that will be covered next installment. Stay tuned… more soon.
Continue to Part Two: Bodybuilding.