Fortunately the vacuum cleaner seems to be coping with the ultra fine dust. I am also spritzing water every so often and am wearing a dust mask.
A new Bounty Hunter-Shae Vizla The Old Republic
-
mdb

- Captain

- Posts: 400
- Joined: Fri Mar 05, 2010 9:48 am
Re: A new Bounty Hunter-Shae Vizla The Old Republic
It really does! I had my netbook carefully covered in its neoprene case up and away from where I was working and I found dust in the keypad!. Glad i shifted my machines to the other end of the workoom 
Fortunately the vacuum cleaner seems to be coping with the ultra fine dust. I am also spritzing water every so often and am wearing a dust mask.
Fortunately the vacuum cleaner seems to be coping with the ultra fine dust. I am also spritzing water every so often and am wearing a dust mask.

-
mdb
- Captain
- Posts: 400
- Joined: Fri Mar 05, 2010 9:48 am
Re: A new Bounty Hunter-Shae Vizla The Old Republic
Cough, sneeze, hack.. no not really but there is a decided layer of dust on my face that I can't seem to shift...

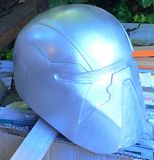
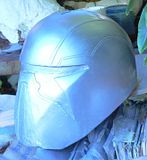
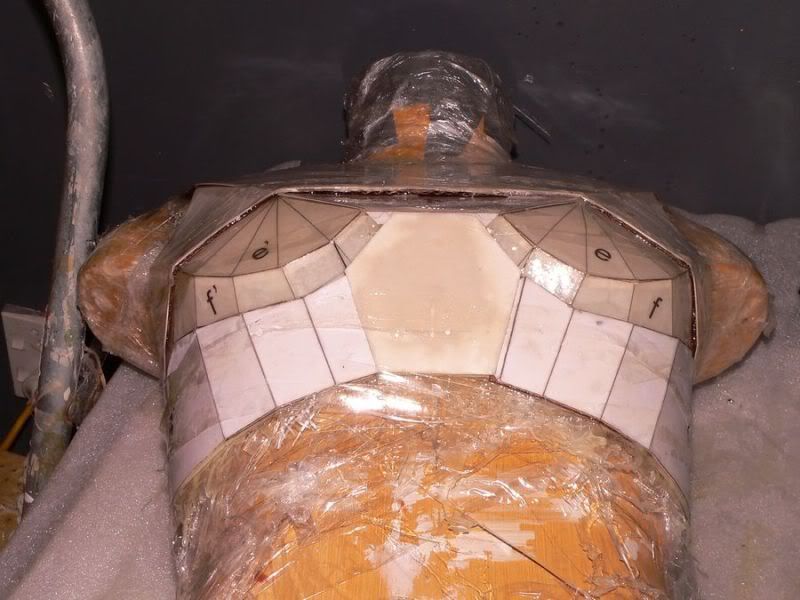
So since the last time I have cut the bottom edge and tidied some more of the details. That silver is only temporary I wanted to see how much it would soften the details (yay, just enough to actually improve the effect than diminish) and find the real un-eveness as opposed to how uneven the patched pink and cream made it
So next up will be to sand that silver back and bog the patches I already knew about as well as those that will become apparent after the sanding. Then getting proper primer on to cut back and redo And then hopefully making a proper silicon mold  Much as I love the budget method I do need to repair a few of my molds. It seems condensation cure silicon does not like urethane as much as the two part.
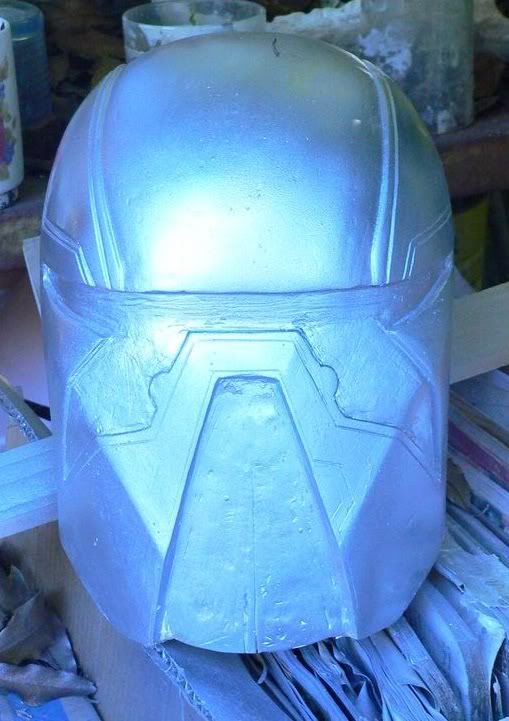

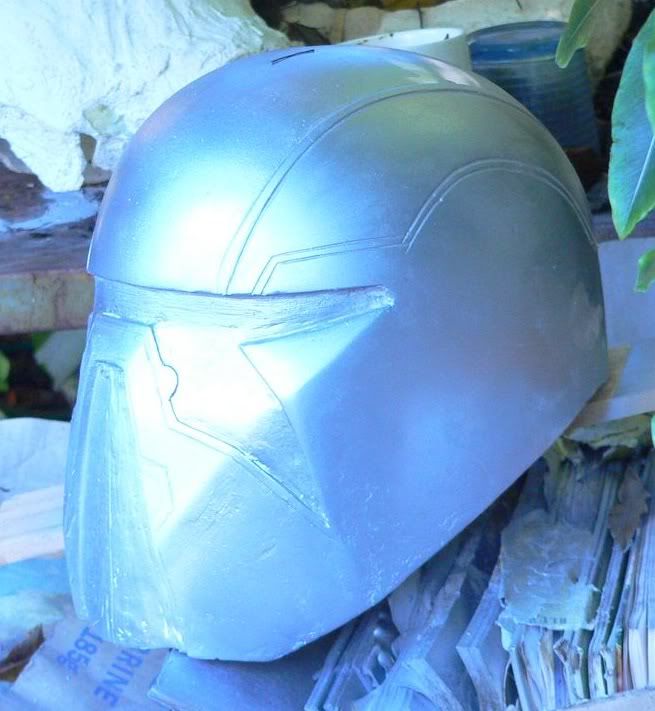
So since the last time I have cut the bottom edge and tidied some more of the details. That silver is only temporary
So next up will be to sand that silver back and bog the patches I already knew about as well as those that will become apparent after the sanding. Then getting proper primer on to cut back and redo
-
Deadalus Thorn

- Ensign

- Posts: 77
- Joined: Sun May 30, 2010 9:58 pm
- Country: New Zealand
Re: A new Bounty Hunter-Shae Vizla The Old Republic
Impressive
the line detail must have taken ages.
the line detail must have taken ages.
Kind Regards
Deadalus Thorn
Feel free to join our Facebook group
SDT replica props and costumes
http://www.facebook.com/#!/group.php?gi ... 108&ref=mf
Deadalus Thorn
Feel free to join our Facebook group
SDT replica props and costumes
http://www.facebook.com/#!/group.php?gi ... 108&ref=mf
-
mdb
- Captain
- Posts: 400
- Joined: Fri Mar 05, 2010 9:48 am
Re: A new Bounty Hunter-Shae Vizla The Old Republic
Thank you Sorry for the delay I wanted to wait until I had an update
I have done my first practice run of wiring up leds into a real honest to goodness circuit It went well, worked out power supply and driver and got everything connected up properly
And thus it was also my first foray into soldering. And desoldering and understanding how de-solder braid works (must pick some up... it will make lie easier.
I had to redo a part as the wire that the battery holder came with pretty much sucks. Brittle plastic and very few and fine wires.
And now I feel really confident in cutting up some Xmas tree decorations I bought on sale and rewiring them into costume elements
I thought I was having fun with fibregalss.... Gimme the wire and electricity!
It's now a week from Sydney Armageddon and I will pick back up when I get back. I may not get her totally finished for Wellington but the aim is to get close
I have done my first practice run of wiring up leds into a real honest to goodness circuit
And thus it was also my first foray into soldering. And desoldering and understanding how de-solder braid works (must pick some up... it will make lie easier.
I had to redo a part as the wire that the battery holder came with pretty much sucks. Brittle plastic and very few and fine wires.
And now I feel really confident in cutting up some Xmas tree decorations I bought on sale and rewiring them into costume elements
I thought I was having fun with fibregalss.... Gimme the wire and electricity!
It's now a week from Sydney Armageddon and I will pick back up when I get back. I may not get her totally finished for Wellington but the aim is to get close
-
mdb
- Captain
- Posts: 400
- Joined: Fri Mar 05, 2010 9:48 am
Re: A new Bounty Hunter-Shae Vizla The Old Republic
I had seen pictures of the Mini Bust, obviously but not the blurb that goes with it. Interesting to say the least. It is possibly a spoiler as I haven't seen anything on the official site or in the novel.... But yeah she is a vital character in the game Unless GG have jumped the gun...
http://www.gentlegiantltd.com/product_p/80144.htm
Spoilers in there if they are true...
So. My armour progress this week:
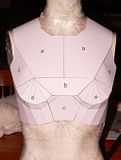

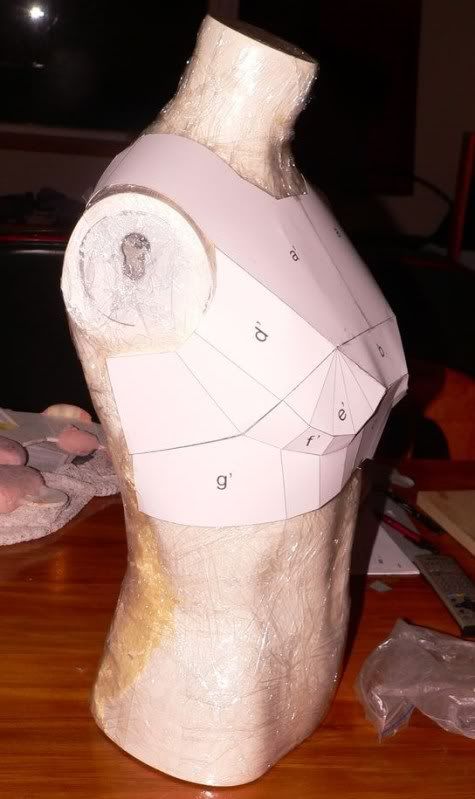
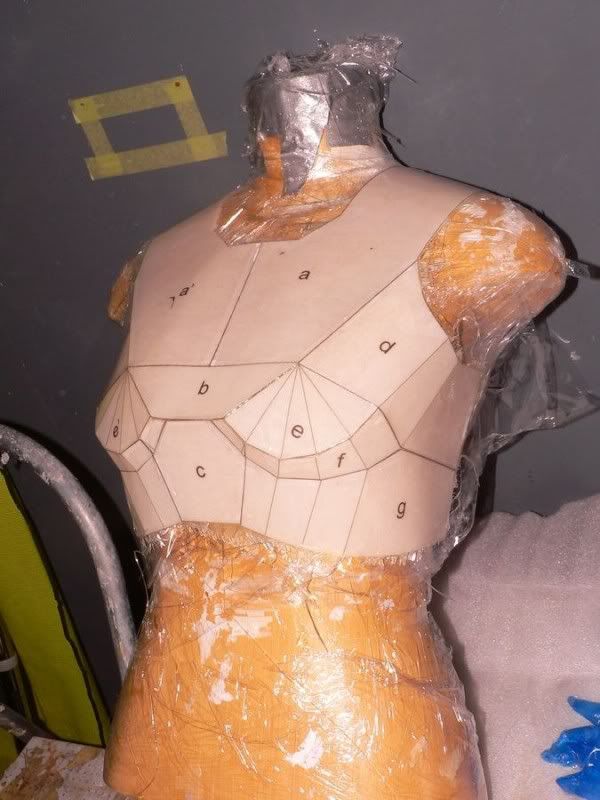
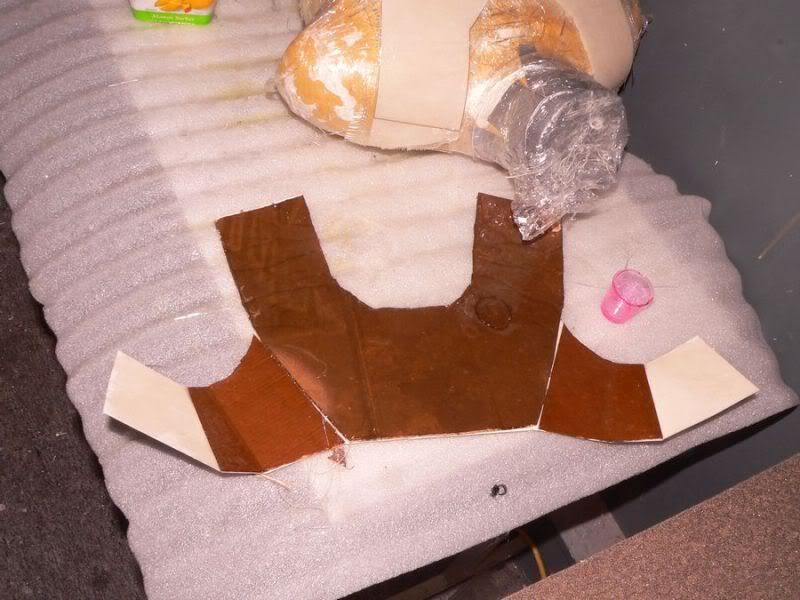
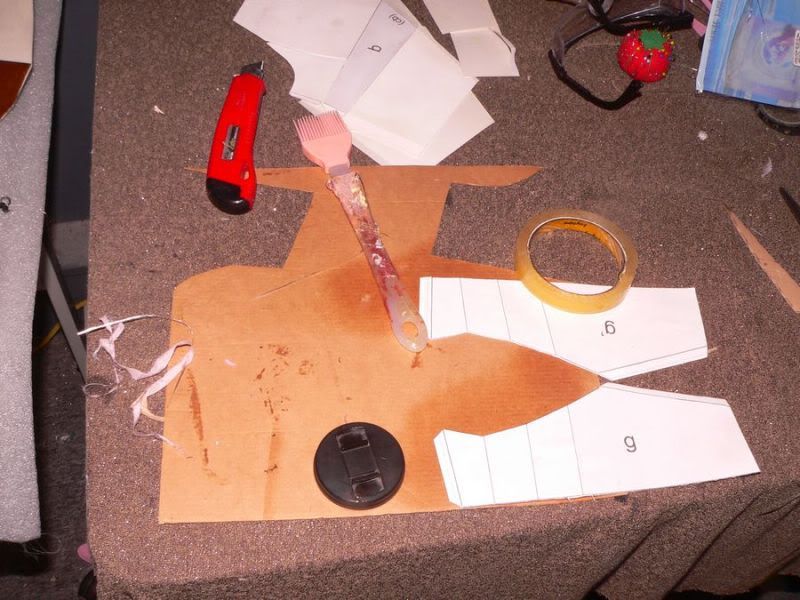
Printed base patterns for the chest armour. Made to fit me, though a little wiggle room for scaling up and down. Still not sure if I need to add more to this base. For me I'm going to try and get dimension by layering where needed. This is not a 3D model that I pepped but is patterned on the dummy.
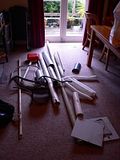

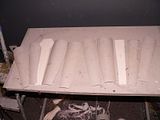
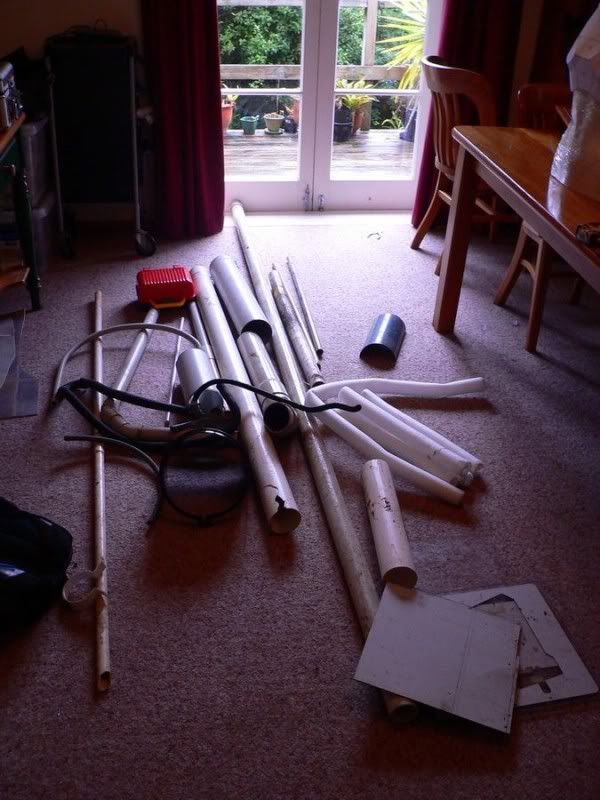
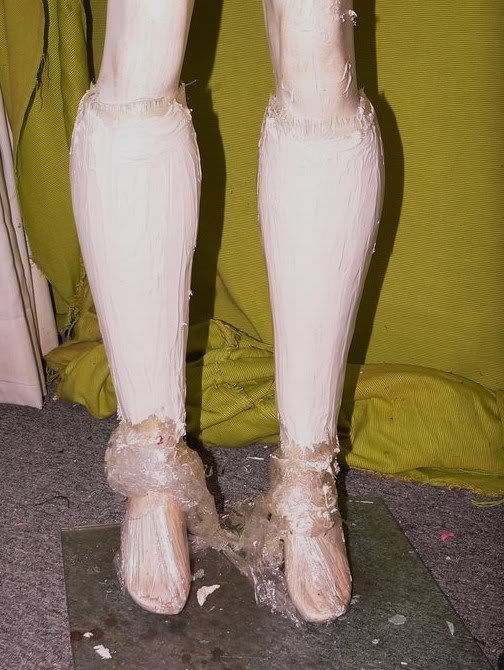
So, score one for inorganic collection! PVC pipe galore and all free! Most from one house too. Must have had a total plumbing refit.
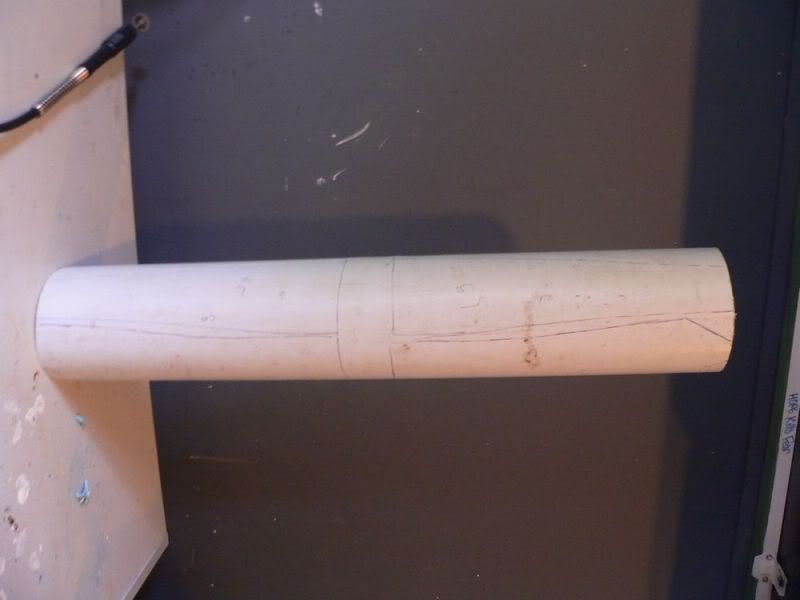
So the greaves in the artwork are pretty flat, I decided to cut and shape from the pvc pipe. Sigh. Not as easy as it might have been due to a few issues. So I am going to have to make a solid base and then use these pieces over that. Luckily they soften nicely with a heat gun. It's trying to shape them that is not working out.I need to tape as I go which doesn't relaly happen to work well on real legs...
Now I should wind up with something closer to the maquette style which is not quite as complex as the cinematic but has nice dimensionality.
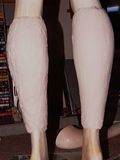
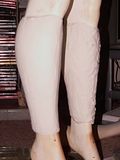


So here I ma putting plasticine all over the legs of my mannequin. She is alien. Her legs are really skinny front on but in profile really wide. What you don't see here is my final shape which has the clay scraped right back from the front and back and a little more from the sides taken out. I think I took off a good 800gm shaving with a ruler.


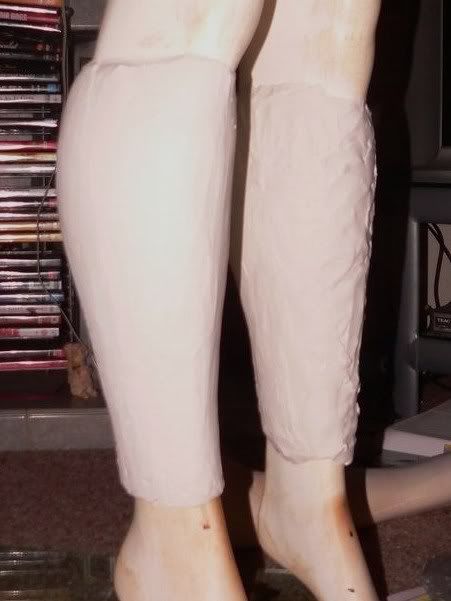
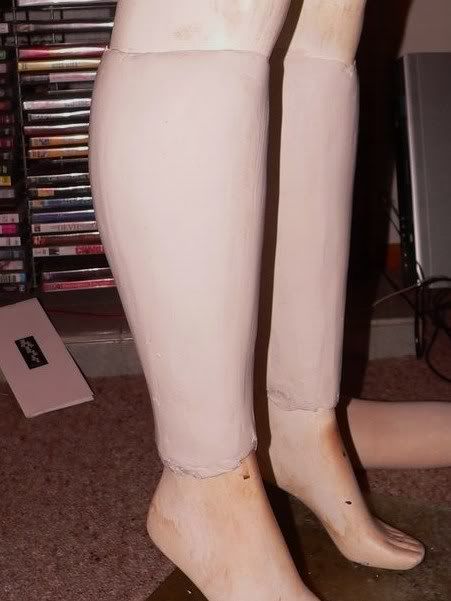
And tonight I got cloth over those legs and in the back of the chest armour.
http://www.gentlegiantltd.com/product_p/80144.htm
Spoilers in there if they are true...
So. My armour progress this week:


Printed base patterns for the chest armour. Made to fit me, though a little wiggle room for scaling up and down. Still not sure if I need to add more to this base. For me I'm going to try and get dimension by layering where needed. This is not a 3D model that I pepped but is patterned on the dummy.

So, score one for inorganic collection! PVC pipe galore and all free! Most from one house too. Must have had a total plumbing refit.
So the greaves in the artwork are pretty flat, I decided to cut and shape from the pvc pipe. Sigh. Not as easy as it might have been due to a few issues. So I am going to have to make a solid base and then use these pieces over that. Luckily they soften nicely with a heat gun. It's trying to shape them that is not working out.I need to tape as I go which doesn't relaly happen to work well on real legs...
Now I should wind up with something closer to the maquette style which is not quite as complex as the cinematic but has nice dimensionality.

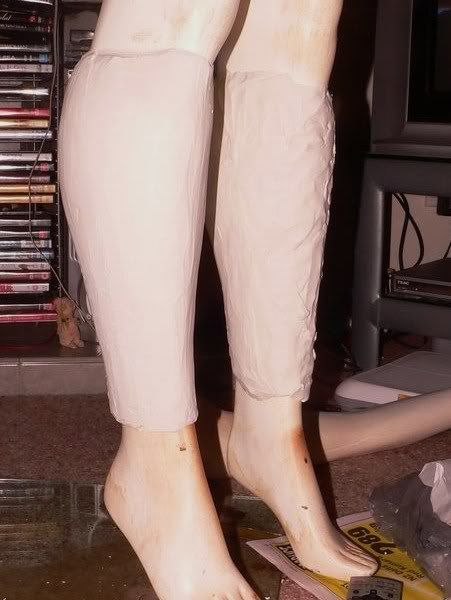

So here I ma putting plasticine all over the legs of my mannequin. She is alien. Her legs are really skinny front on but in profile really wide. What you don't see here is my final shape which has the clay scraped right back from the front and back and a little more from the sides taken out. I think I took off a good 800gm shaving with a ruler.
And tonight I got cloth over those legs and in the back of the chest armour.
-
mdb
- Captain
- Posts: 400
- Joined: Fri Mar 05, 2010 9:48 am
Re: A new Bounty Hunter-Shae Vizla The Old Republic
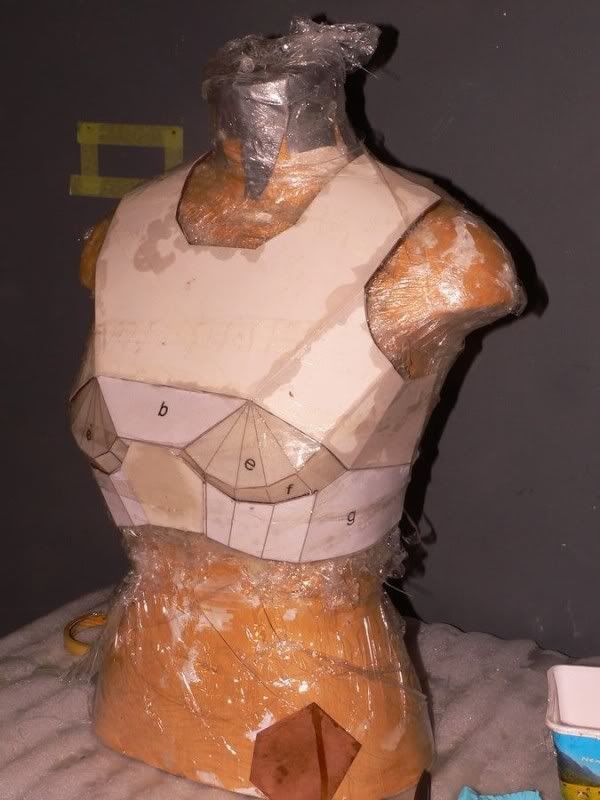

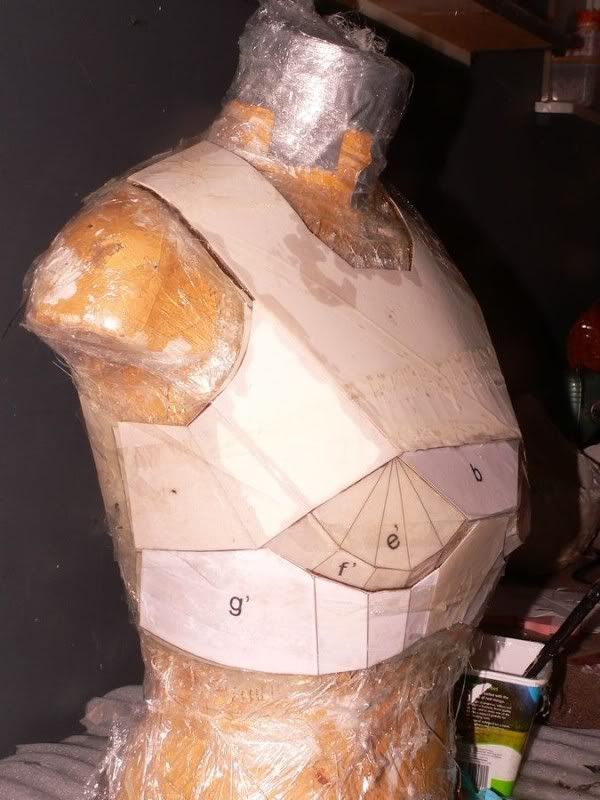
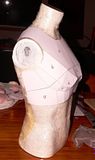
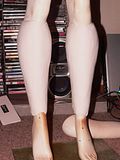
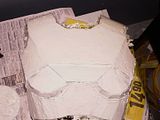
As expected the card buckled a bit. No biggie as it really only buckled where the next layer goes over. This is more card and corrugated card all soaked in more resin and stuck in place. Cellotape is holding it in place while the curing takes place. Inelegant but it works. It should be sturdy enough once the final layer of cloth and tissue go over and be fairly light as the corrugated card is only soaked not filled with the resin.
-
Archon Revuge

- High Colonel

- Posts: 1429
- Joined: Fri Jan 08, 2010 1:03 am
- Country: USA
- Contact:
Re: A new Bounty Hunter-Shae Vizla The Old Republic
Looking great mdb! Can't wait to see this particular project once it's done.

-
mdb
- Captain
- Posts: 400
- Joined: Fri Mar 05, 2010 9:48 am
Re: A new Bounty Hunter-Shae Vizla The Old Republic
Thank you Believe me I can't wait either
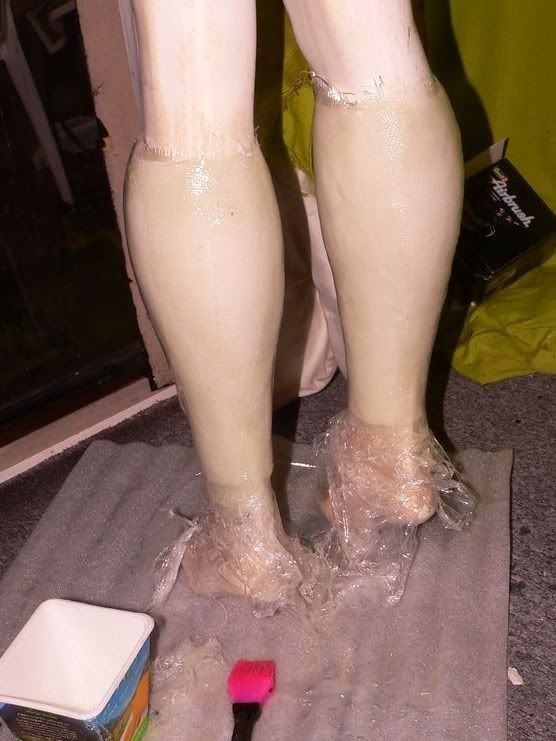
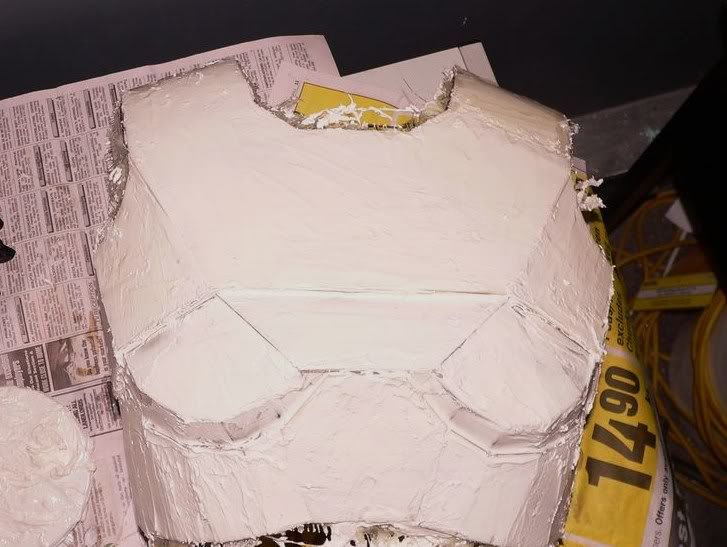
And the next exciting stage. Bogging.

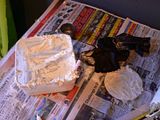
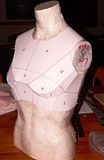
I managed to find a source for good fairing powder (it's still fumed silica but doesn't blow about too badly) and mixed up a nice thick paste and smoothed that on the legs and front of the chest armour. I need to attack it with a sander of course but it is slowly building up.
And if I am good I may have enough to get those blasted Mystique skulls cast finally...
I prefer working with some powder in my epoxy anyway just to make it a little less like runny honey but also to make it opaque. It's just easier to see the surface rather than the substrate that way
Oh yeah and I managed to get splinters and tear my gloves at the same time. So before anything else happens I an cutting the edges of the cloth off asap.
And the next exciting stage. Bogging.

I managed to find a source for good fairing powder (it's still fumed silica but doesn't blow about too badly) and mixed up a nice thick paste and smoothed that on the legs and front of the chest armour. I need to attack it with a sander of course but it is slowly building up.
And if I am good I may have enough to get those blasted Mystique skulls cast finally...
I prefer working with some powder in my epoxy anyway just to make it a little less like runny honey but also to make it opaque. It's just easier to see the surface rather than the substrate that way
Oh yeah and I managed to get splinters and tear my gloves at the same time. So before anything else happens I an cutting the edges of the cloth off asap.
-
oota goota

- High Colonel
- Posts: 1908
- Joined: Tue Mar 23, 2010 12:08 am
- Country: New Zealand
- Location: Taranaki
- Contact:
Re: A new Bounty Hunter-Shae Vizla The Old Republic
awesome work Mdb i love your approach to making and also wow you must like have NO free time
-
vctrsone

- Lieutenant

- Posts: 161
- Joined: Sun Apr 17, 2011 4:52 pm
- Country: new zealand
- Location: Central Auckland
Re: A new Bounty Hunter-Shae Vizla The Old Republic
All i can say is WOW! and i need to look at this thread a lot more often!
Maker of stuffs and things.