JdFlute's BB-8 Build

Ideas, tutorials, questions relating to armour, costumes and replica props from the Star Wars universe
User avatar
jdflute
Ensign
Ensign
Posts: 11
Joined: Tue Nov 08, 2016 8:25 am
Country: New Zealand
Location: North Shore Auckland

JdFlute's BB-8 Build

Post by jdflute »

Ok,
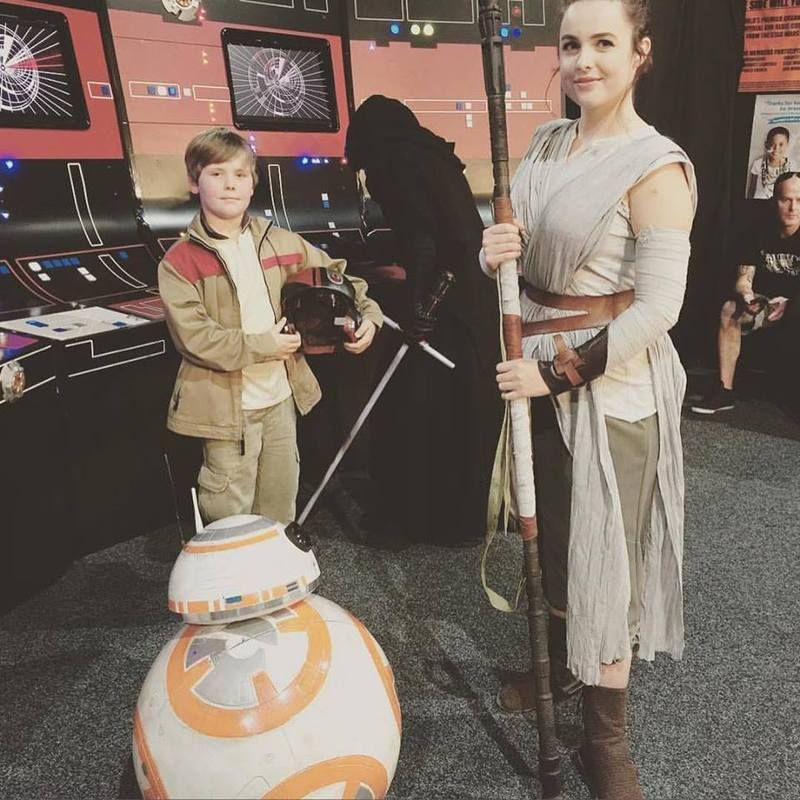
Starting at the beginning, I was building an Attack on Titan Cos play costume for my eldest son for Armageddon 2016, when his younger brother decided that he wanted to go in costume too, as Poe Dameron and wouldn't it be cool if he had a full size BB-8 with him?

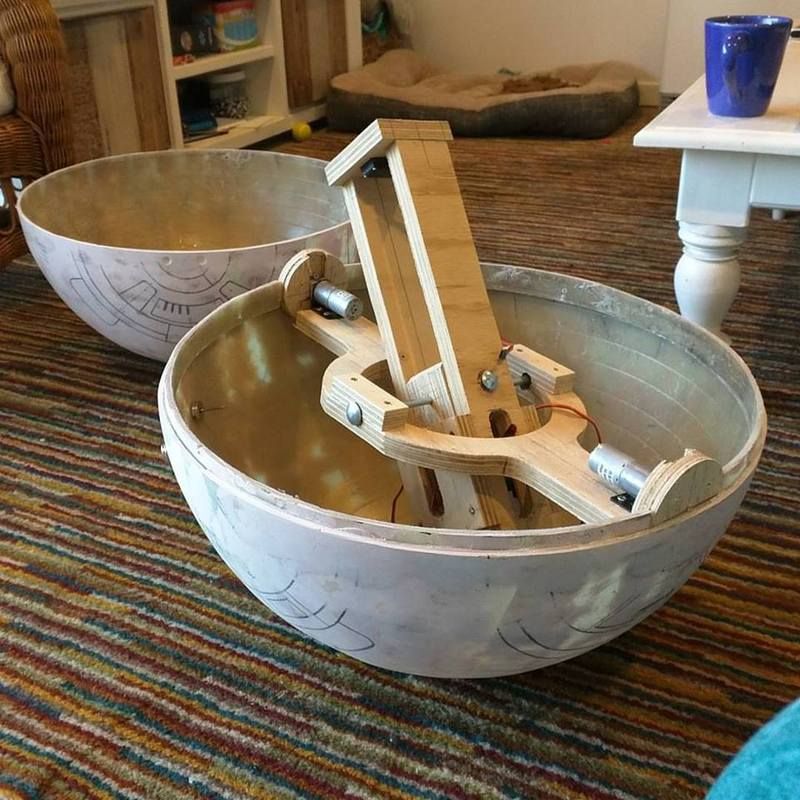
Not having a 3d Printer/CAD skills, led me down the route of a more hands on approach and, deciding that the body needing to be more robust than papier-mache, I went and had a chat with the guys at NZ Fibregass in Panmure.
Their help was invaluable as I had never worked with the stuff before and I was 'schooled' in all I needed to know in ten minutes flat.

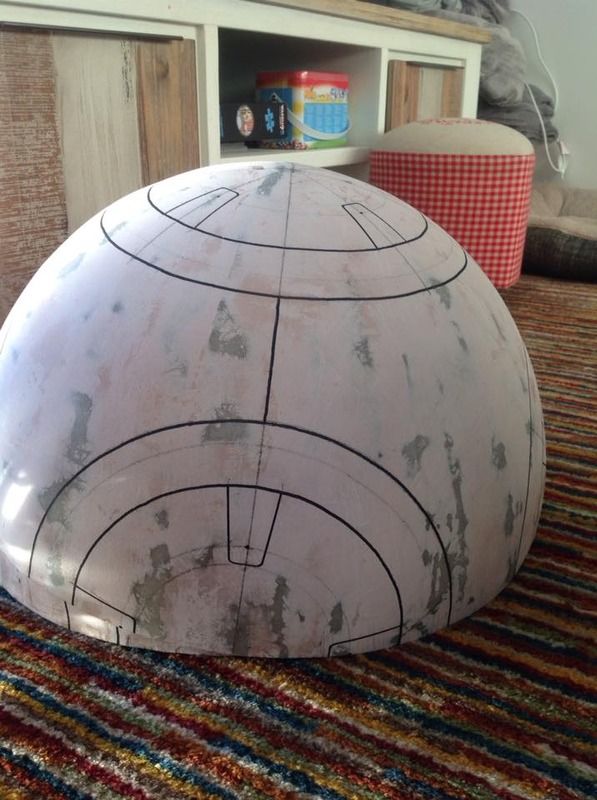
My mould would be a 500mm diameter yoga ball, $5 off trade me. There are various sizes so if you are contemplating this as well make sure you get the size right. I inflated the ball and sat it in a bucket, cut the fibreglass mat into rough petal shapes, mixed up the resin and got busy. It is an extremely messy business but relatively easy to get the hang of, certainly nothing to get wound up over. After 24hrs I deflated the ball a little, trimmed back the excess and then turned it over and did the second half. You do need a proper respirator when using the stuff, especially when cutting and sanding, but then you should have one anyway for the painting process.

Once I had a solid sphere, i finished the surface with car bodyfiller, on special from supercheap auto which was good because I needed quite a bit.
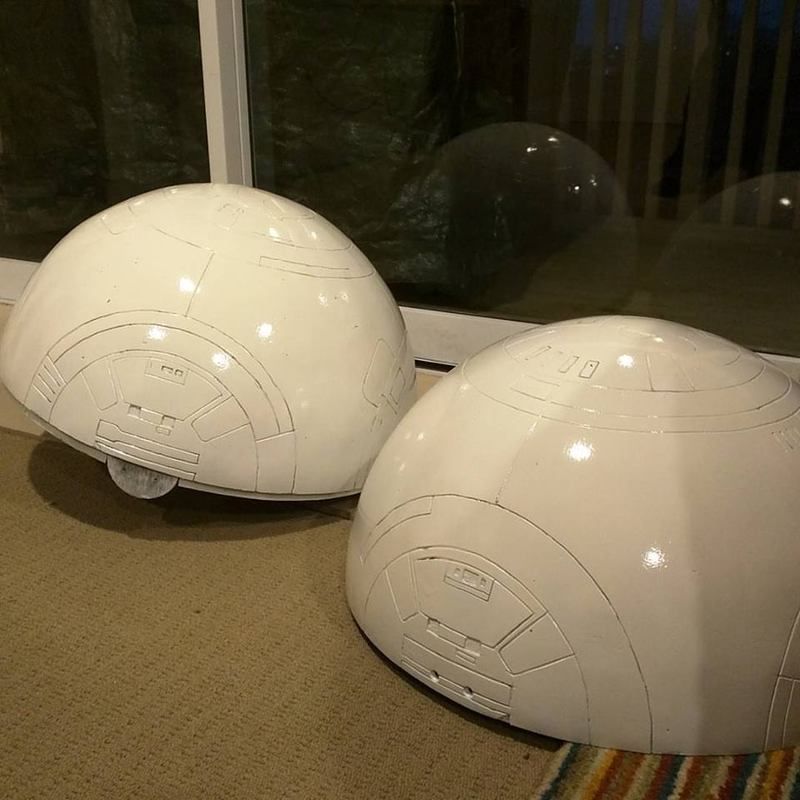
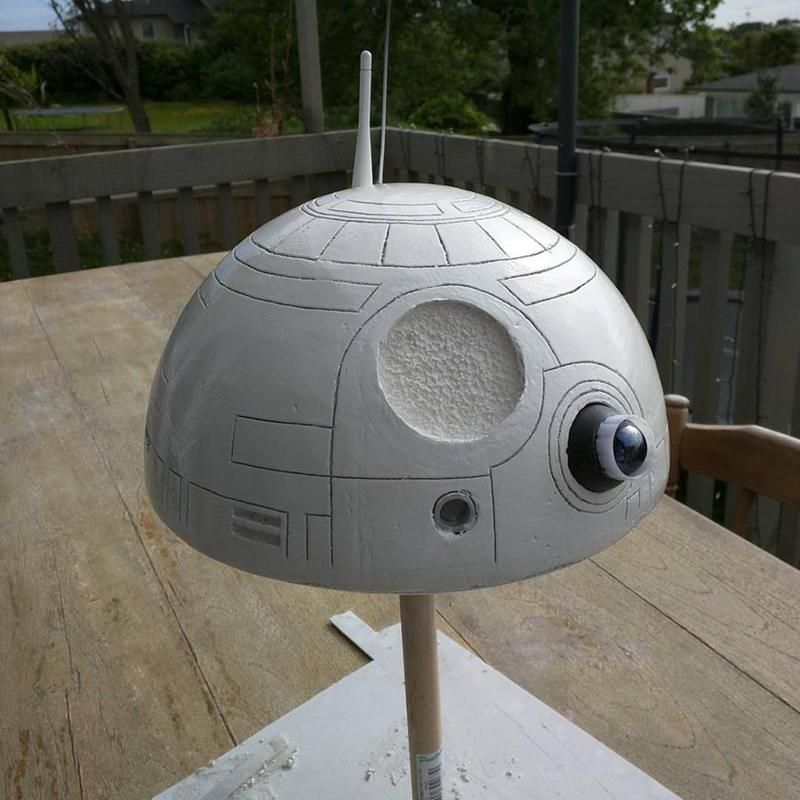
After sanding and filling and sanding and filling and sanding, I was finally happy with the finished product and set about marking up the panels.

Image

Image

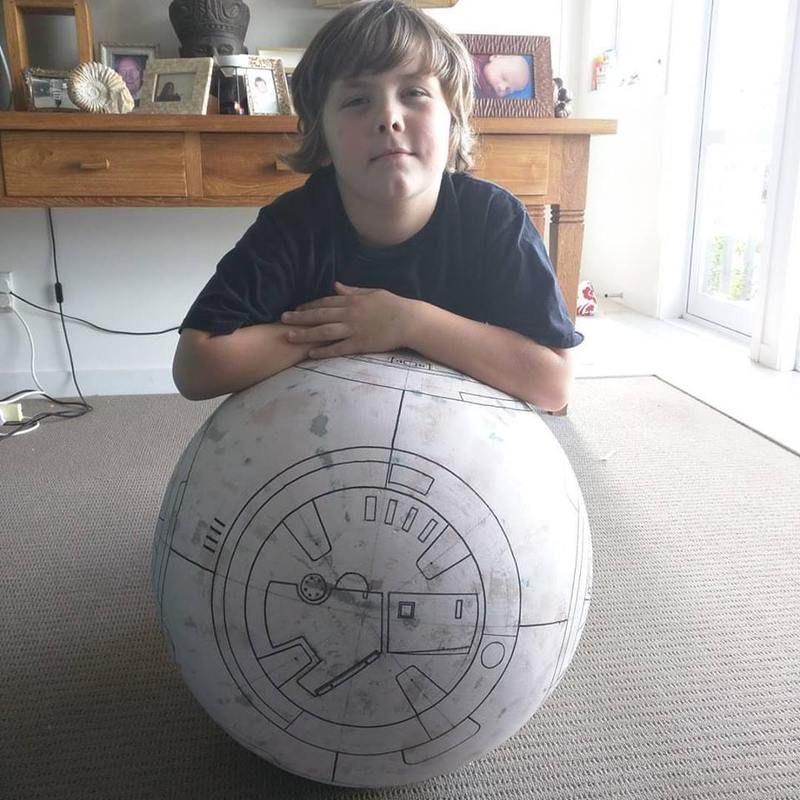
This was the easy bit, as I had chosen to score out the lines with a dremel, and that was truly awful!
I fortunately had a depth guide attachment which turned the dremel into a mini router, this proved to be a life saver, although a very time consuming process.

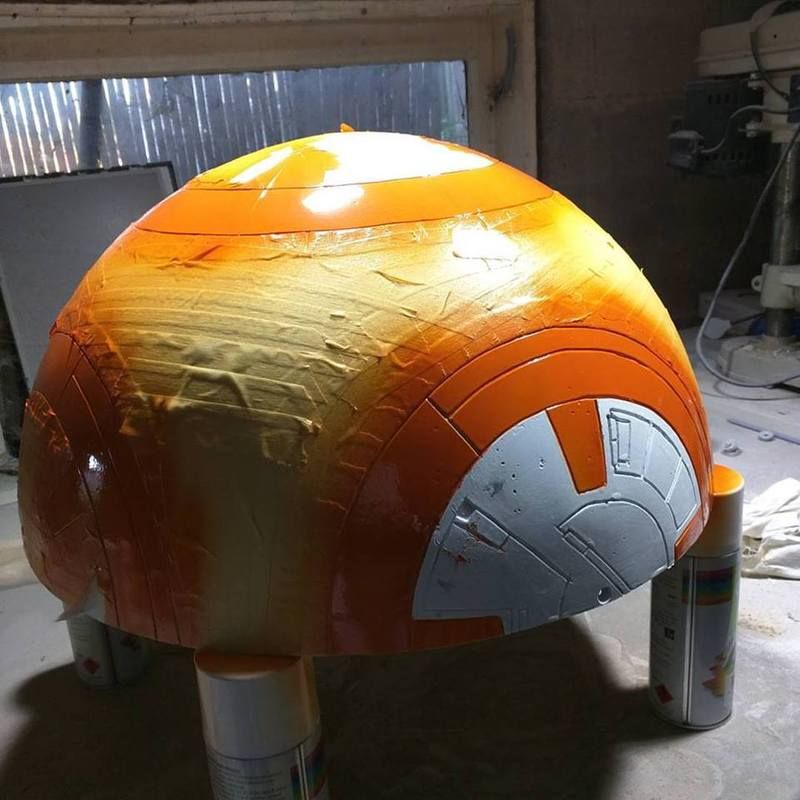
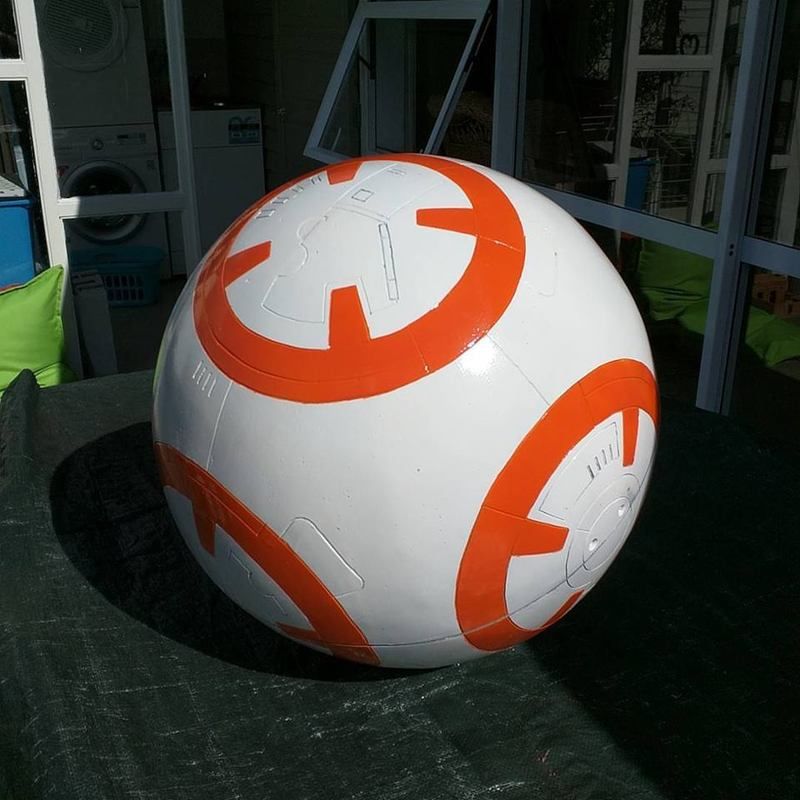
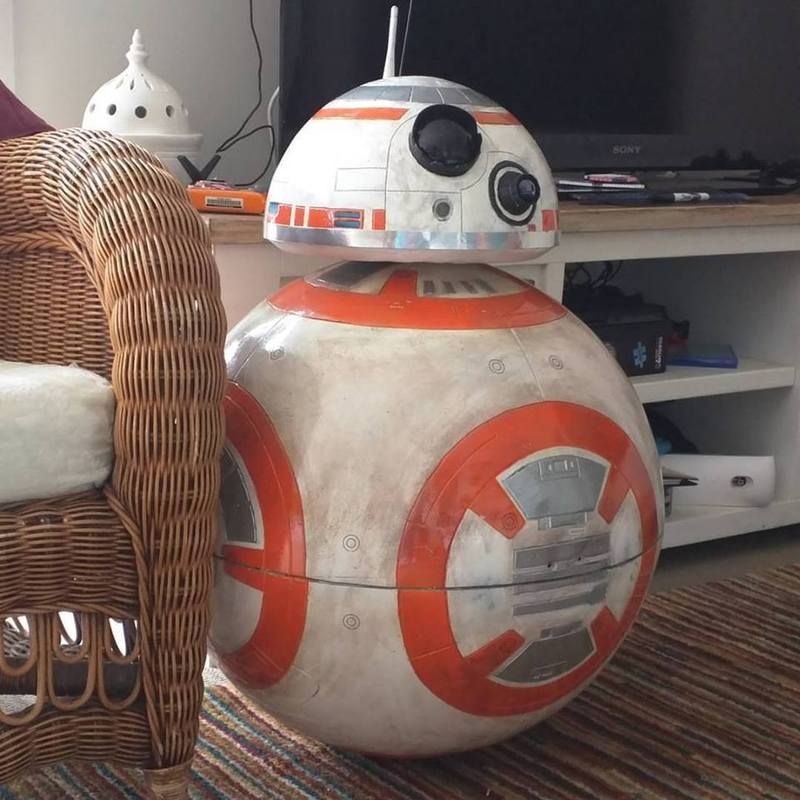
And from there BB-8 went to the paint shop....
User avatar
jdflute
Ensign
Ensign
Posts: 11
Joined: Tue Nov 08, 2016 8:25 am
Country: New Zealand
Location: North Shore Auckland

Re: JdFlute's BB-8 Build

Post by jdflute »

Now, what you have to remember is that I was on an extremely tight timescale with a drop dead date of 21st October, as such I chose materials that I could easily work with and when I cocked up (there is no try, just do or do not), I would not loose to much time fixing the error of my ways.
The sphere was now at a point where I could fabricate the internal mechanism, based on real physical measurements. I chose plywood and measured once and cut twice, Doh! Second time was better and I eventually ender up with this...

Image

So what you see here are twin geared motors capable of 5N/cm2 each, a central gimbal controlled by two servos, and a third servo at the top for head rotation.

I quickly realised that there were some flaws in my design, the first was the two motor design. Trying to get two motors, one running forward and one in reverse, to run at the same speed is possible but not when you are in a rush. I therefore scrapped that idea and switched to a bigger single motor (50N/cm2) with a freely rotating axel on the other side. I also realised that the gimbal was far more complexed than it needed to be. Instead of four way control from two servos, all I really needed was left and right, forward and backward tilt could be achieved using the drive motor.

There is another flaw that I didn't notice until after Armageddon, but I will leave that until later.
User avatar
jdflute
Ensign
Ensign
Posts: 11
Joined: Tue Nov 08, 2016 8:25 am
Country: New Zealand
Location: North Shore Auckland

Re: JdFlute's BB-8 Build

Post by jdflute »

So feeling comfortable that I had ironed out any major kinks :rotfl: , I set about painting....

Image

Image

Image

The one thing I hadn't factored in was getting paint to dry during a cold and wet New Zealand winter....

This was the perfect time for me to 'perfect' the drive mechanism, and learn about arduino programming, which I consummately failed to do.
User avatar
jdflute
Ensign
Ensign
Posts: 11
Joined: Tue Nov 08, 2016 8:25 am
Country: New Zealand
Location: North Shore Auckland

Re: JdFlute's BB-8 Build

Post by jdflute »

Ok, so now I am starting to feel my time constraints, I fit the mechanism with the head magnets only to discover that they needed to be far closer to the inside surface than I had factored :( , the internal guide lip had to go and in doing so I could get the magnets grazing the inside of the globe.

Realising that arduino programming was a step too far in the short time I had left, I resorted to a fall back position of remote control. fortunately I had spare parts from a long term project, a 1/8th scale Israeli Main Battle tank the Merkava Mk3 Dor Dalet

So this gave me access to cheap but powerful speed controllers and easy and accurate control of servos. It is also incredibly quick to set up.

My transmitter has nine available channels, but right now all I needed was three, fwd/back, left/right, and head rotation. Knowing that I had more was good, because I wanted to develop sound and light as well.

Having put it all together and powered it up I discovered a few more design flaws :o

The first was the magnets, they weren't powerful enough! I didn't have time to get them cheaply from outside NZ and I was having to guess how powerful I really needed them.
Fortunately Magnets New Zealand in Albany came to my rescue, I took BB-8 with me to their showroom and tested out different sizes until I found the right size and strength.

The second was getting BB-8 to roll, he just wouldn't do it :o
It proved to be an issue of weight or lack of. I had originally decided to use a very large battery from the Merkava tank, but the original speed (Merkava) controller died on me. In changing the speed controller, I had to change the power supply and thus a lot less weight. The solution was to shorten the pendulum and attach a 4kg diving weight I had lying around to the underside (very close to the surface of the sphere). This helped a lot, but drive was still hit and miss and I didn't fix the problem until the morning of Armageddon!
User avatar
jdflute
Ensign
Ensign
Posts: 11
Joined: Tue Nov 08, 2016 8:25 am
Country: New Zealand
Location: North Shore Auckland

Re: JdFlute's BB-8 Build

Post by jdflute »

I was now left with three weeks remaining and had not started on the head.
Fortunately I had planned on using a polystyrene sphere to minimise weight, unfortunately I couldn't find a supplier of the right size. Eventually I discovered Takapuna Art Supplies had one that would fit the bill.

Cutting was easy, but I had to use a light weight wood filler to protect the sphere from the paint.

Image

If you look at where the radar eye sits you might see how the spray paint melts the polystyrene.
The lines were cut with a hacksaw blade and tidied up with a small hand file. I then filled them with more filler.

The holo lens was fabricated from a couple of ping pong balls, a marble and some plastic tube.

And of course the arial was off an old wi-fi router!

A bit more paint and voila!

Image
User avatar
jdflute
Ensign
Ensign
Posts: 11
Joined: Tue Nov 08, 2016 8:25 am
Country: New Zealand
Location: North Shore Auckland

Re: JdFlute's BB-8 Build

Post by jdflute »

So this is the last post for tonight.

It is now the six o'clock in the morning of Armageddon and BB-8 is playing silly buggers. In a moment of unusual clarity I realise that there is too much play in the gimbal of the drive mechanism. The beauty of simple materials is my saving grace and within an hour I have a whole new solid mechanism and BB-8 finally rolls!

His head wont stay on though :rotfl:

So with a semi successful droid, Poe and AoT Cosplayers in tow we head off for Armageddon.


And it is soooo busy! There is no way I can have BB-8 rolling around with his head falling off every couple of minutes, fortunately the nice guys and gals at Outpost 42 let me camp out and BB-8 did a little delicate rolling and a fair bit of turning heads.

Image

So that is my build in a nutshell, but the story doesn't stop there and given a little time I will bore you with further details of the strip down and rebuild that has happened over the last two months, but not tonight.

ps. This last photo isn't mine so I hope that 'Rey' doesn't mind that I posted it.
SlyClone
Lieutenant
Lieutenant
Posts: 120
Joined: Sat Apr 05, 2014 12:46 pm
Country: New Zealand
Location: Christchurch

Re: JdFlute's BB-8 Build

Post by SlyClone »

Awesome work! Especially on the tight deadline you had for it. I like how you used the yoga ball to get the shape for BB-8, did you have to coat the ball in a mould release at all? Or just resin the fibreglass mat straight to it?
User avatar
badges2nz
High Colonel
High Colonel
Posts: 1047
Joined: Fri Jul 23, 2010 11:35 am
Country: New Zealand
Location: Otaki

Re: JdFlute's BB-8 Build

Post by badges2nz »

Nice detail and work on your bb8, what size yoga ball did you end up using?
Doomsday and Armageddon got together and had a baby and man is it ugly.
User avatar
jdflute
Ensign
Ensign
Posts: 11
Joined: Tue Nov 08, 2016 8:25 am
Country: New Zealand
Location: North Shore Auckland

Re: JdFlute's BB-8 Build

Post by jdflute »

I think the yoga ball was 500mm diameter if I remember correctly and I didn't use any release agent. The ball was destroyed in the final cutting process and peeled off the inside without too much difficulty. Thanks for the comments, I will be adding more about the rebuild later.

Jd
User avatar
oota goota
High Colonel
High Colonel
Posts: 1908
Joined: Tue Mar 23, 2010 12:08 am
Country: New Zealand
Location: Taranaki
Contact:

Re: JdFlute's BB-8 Build

Post by oota goota »

awesome build nice one jdflute
Post Reply